![01_Outcomes_circle_r_FINAL_300dpi-01.png]](https://outcomes.com/hs-fs/hubfs/01_Outcomes_circle_r_FINAL_300dpi-01.png?height=40&name=01_Outcomes_circle_r_FINAL_300dpi-01.png)
- New Users
New Users can create accounts in the Outcomes Platform by following the series of steps outlined below. During the account creation process, users can then request that they be assigned to the Pharmacy Administrator role in the Outcomes Platform.
Account Creation Steps
-
- Navigate to the Outcomes Platform by opening a web browser (e.g., Google Chrome or Microsoft Edge) and accessing the URL provided below:
URL: https://www.outcomes.com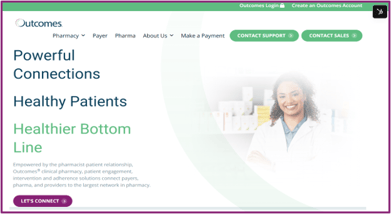
- Click on the Outcomes Login option in the upper righthand corner of the screen. A new tab will open in your browser that displays the Outcomes Login screen as shown below:
- Navigate to the Outcomes Platform by opening a web browser (e.g., Google Chrome or Microsoft Edge) and accessing the URL provided below:
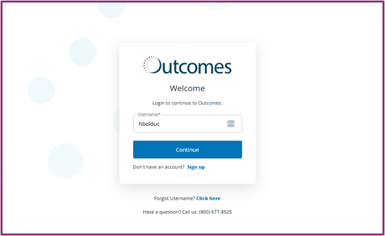
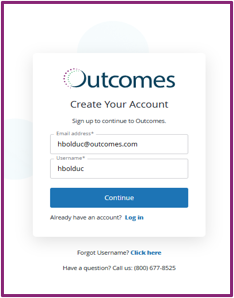
3. Select the Sign Up option. Then, enter your Outcomes e-mail address and desired username and click on the Continue button.
NOTE: It is recommended to use the combination of first initial + last name (e.g., hbolduc) for your Outcomes Platform username.
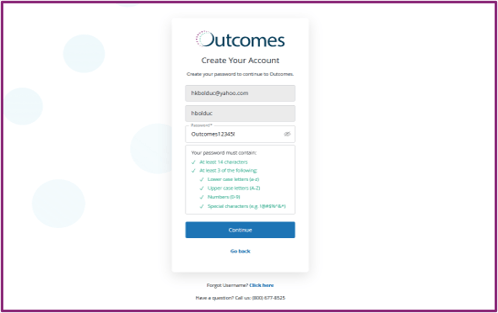
4. Click in the Password textbox and input your desired password. Then, click on the Continue button.
NOTE: Outcomes Platform passwords must meet the following parameters:
-
-
-
- At Least 14 Characters Long
- Contain at least 3 of the following:
- Lower Case Letters
- Upper Case Letters
- Numbers
- Special Characters
-
-
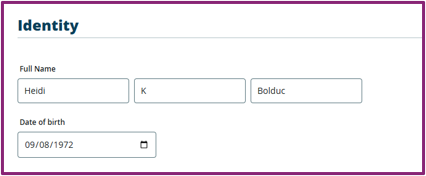
5. From the Identity screen, click in the Full Name textboxes and input your first name, middle initial, and last name. Then, click in the Date of Birth textbox and use the Calendar icon to input your birth date.
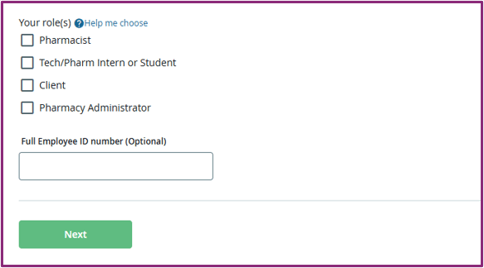
6. Next, place a checkmark in the box next to the user role(s) that you would like for this account to be setup with. For this guide, it is recommended to select the Pharmacy Administrator role.
NOTE: Please review the section later in this guide for more details on the differences between the Pharmacist, Tech/Pharm Intern or Student, Client, and Pharmacy Administrator roles.
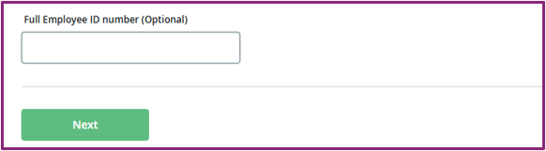
7. Typically, there is not a need to supply an employee ID number unless it makes sense to use this field for your specific pharmacy. So, there is no need to fill in the optional Full Employee ID Number textbox. Instead, simply click on the Next button.
NOTE: Each user role has specific account creation requirements that may or may not need to be completed prior to submission. Please review the section later in this guide for more details.
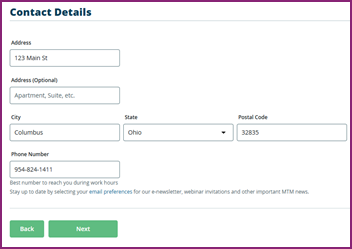
8. From the Contact Details screen, click in the Address, Address (Optional), City, State, Postal Code, and Phone Number textboxes and fill in the corresponding pieces of information. Then, click on the Next button.
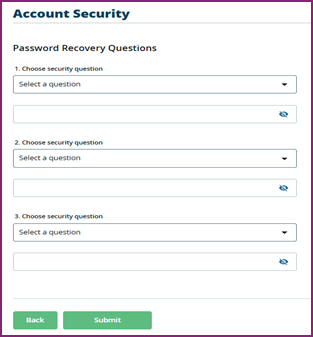
9. From the Contact Details screen, select your desired 3 Security Questions by clicking on each of the dropdowns. Next, enter the answer to each of your security questions using the textboxes below. Then, click on the Submit button.
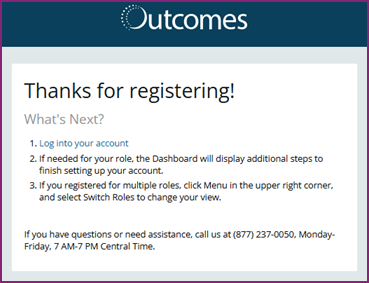
10. Confirm that your account setup was successful by making sure that you see the Thanks for Registering! message as displayed below:
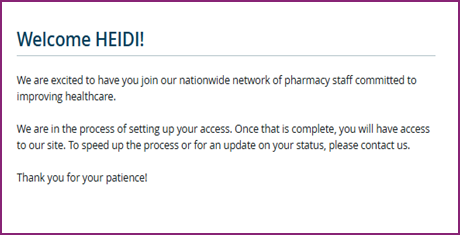
11. Click on the Log into Your Account link. Verify that the Welcome message appears.
12. Expect it to take about 24-48 hours for your user role settings to be approved by the Outcomes network administration team.
NOTE: If your account has still not been approved after this waiting period, please send an e-mail to info@outcomes.com for additional assistance.
II. Existing Users
Existing Users can log in with their existing accounts for the Outcomes Platform. Then, users can request that they be assigned to the Pharmacy Administrator role in addition to any other roles that they may currently possess.
Requesting the Pharmacy Administrator Role Steps
1. Navigate to the Outcomes Platform by opening a web browser (e.g., Google Chrome or Microsoft Edge) and accessing the URL provided below:
URL: https://www.outcomes.com
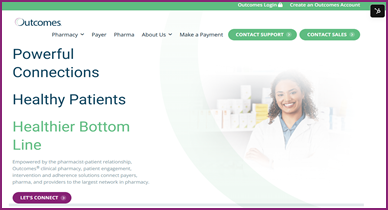
2. Click on the Outcomes Login option in the upper righthand corner of the screen. A new tab will open in your browser that displays the Outcomes Login screen as shown below:
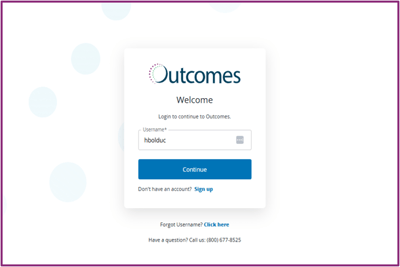
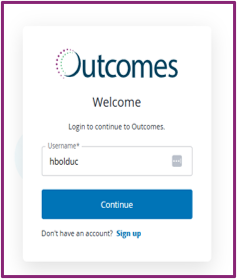
3. Enter your Outcomes Platform username in the Username textbox. Then, click on the Continue button.
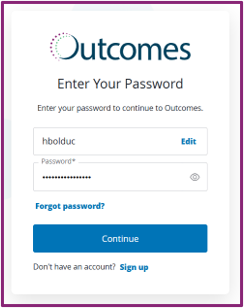
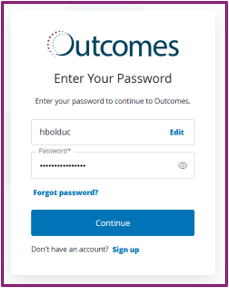
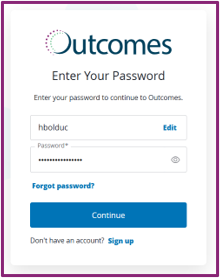
4. Enter your Outcomes Platform password in the Password textbox. Then, click on the Continue button.
NOTE: Click on the Forgot Password? link if a password reset is needed.
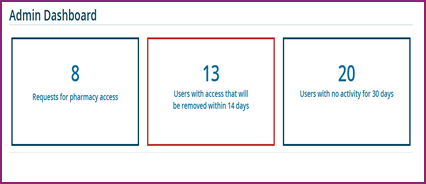
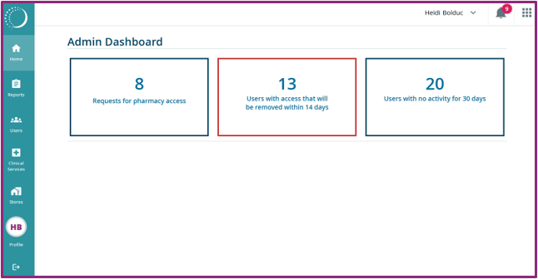
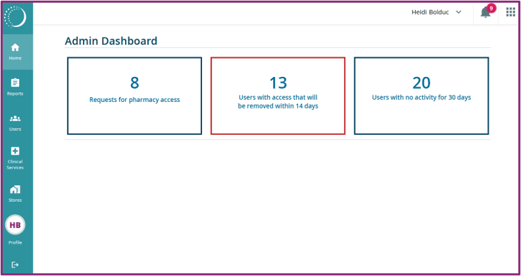
5. If you can see the Pharmacy Admin Dashboard as shown below, then the Pharmacy Administrator user role has already been assigned and there is no need to request access. If any other screen appears, then continue to step 6.
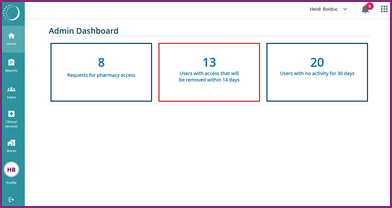
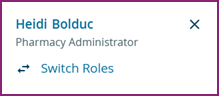
NOTE: It may be necessary to click on the Down Arrow icon to the right of your name in the upper righthand corner of the screen and select the Switch Roles option to view all available roles. If it appears, you can then select the Pharmacy Administrator option from the dropdown menu and click on the Go button.
6. Send an e-mail to info@outcomes.com stating your name, username, and e-mail address with the request to add the Pharmacy Administrator user role. Expect it to take about 24-48 hours for this request to be fulfilled.
7. Login to your Outcomes Platform account again and verify that you can now view the Pharmacy Admin Dashboard.
- User Role Guidelines
The Outcomes Platform has four user roles that can be selected when creating an account for a new user or adding a role for an existing user, including the Pharmacy Administrator role. Each role has a distinct purpose, although it is possible for a user to possess more than one role at a time if needed. It is also possible for each role to require additional information to be provided before completing the account creation process.
Outcomes Platform User Roles:
-
-
-
Pharmacy Administrator - Provides oversight for MTM activities at select pharmacy locations. Includes access to reporting for multiple pharmacies and managing employee access.
-
Pharmacist - Performs MTM services for qualified patients and has the ability to bill for patient services and review patient history details as needed.
-
Technician/Student/Intern - Supports pharmacy personnel who perform MTM services. Needs access to document services provided by a trained Pharmacist.
-
Client - Contracted with Outcomes to administer MTM programs. Needs access to view reports and MTM services provided to your members.
-
-
User Role Additional Requirements:
-
-
-
Pharmacy Administrator – Company and Job Title are required to provide during the account creation process. Full Employee ID number is optional.
-
Pharmacist – Pharmacist License Number and License State are required to provide during the account creation process. Full Employee ID number and NPI number are optional.
-
Technician/Student/Intern - Full Employee ID number is optional.
-
Client - Company and Job Title are required to provide during the account creation process. Full Employee ID number is optional.
-
-
Note that the Pharmacy Administrator role focuses on providing oversight for multiple pharmacies and allows for expanded reporting capabilities for the purpose of monitoring pharmacy engagement, pharmacist activity, progress toward MTM goals, and overall MTM program performance.
II. Account Lock Guidelines
If a user is not active for a period of more than 60 days in the Outcomes Platform, their account will become automatically locked. Before this occurs, users will receive an e-mail sent from donotreply@outcomesmtm.com warning them that they will need to login to the Outcomes Platform using the account associated with their Pharmacy Administrator role to prevent this from happening. If a user’s account becomes locked, they will retain access to their Pharmacy Administrator role; however, they must request access again to the specific pharmacy to which they were assigned.
III. Account Timeout Guidelines
There are two guidelines to be aware of when it comes to account timeouts in the Outcomes Platform. These can be broken down into Inactivity Timeouts and Session Timeouts, which will both cause the user to experience a brief delay while working due to a prolonged period of inactivity.
Account Timeout Types:
-
-
-
Inactivity Timeouts: User is paused after 15 or more minutes of no activity
-
Session Timeouts: User session is terminated after 60 or more minutes of no activity
-
-
To prevent either of these account timeouts from occurring, the user simply needs to make sure that they are logged in and actively engaging (i.e., clicking on buttons, scrolling through pages, or saving work in progress) with the Outcomes Platform.
- Dashboard Functions
The Pharmacy Administrator Dashboard displays pending requests for the pharmacy that you are assigned to manage. Specifically, this includes pending requests for Pharmacy Access, Inactive Users to be Removed within 14 Days, and Inactive Users with No Activity for 30 Days.
Dashboard Functions Explained
- Pharmacy Access
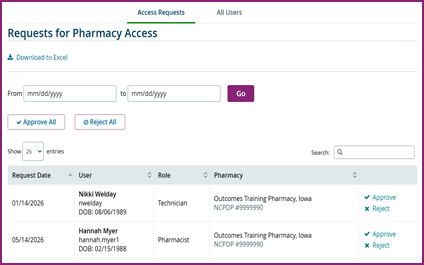
- Access Requests
- View users who have requested Pharmacy Access
- Approve users who have requested Pharmacy Access
- Reject users who have requested Pharmacy Access
- Filter access requests by Start Date / End Date
- Search access requests by Name, Username, or Date of Birth
- Access Requests
-
- All Users
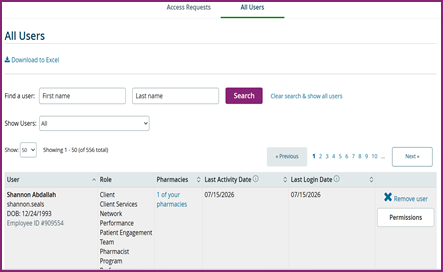
- View all active users and permissions
- Remove users as needed
- Search users by First Name or Last Name
- Filter users by All, Users who will lose access within 14 days, and Users with no activity in the last 30 days
- All Users
- Inactive Users to be Removed within 14 Days
- Lists users that have been inactive for 60 days or more
- Users will be removed within 14 days
- View all inactive users and permissions
- Remove users as needed
- Review Important User Dates:
- Training Date
- Last Activity Date
- Last Login Date
- Inactive Users with No Activity for 30 Days
- Lists users that have been inactive for 30 days or more
- Users are at risk of being removed if they remain inactive
- View all inactive users and permissions
- Remove users as needed
- Review Important User Dates:
- Last Activity Date
- Last Login Date
II. Dashboard Functions
The Pharmacy Administrator Dashboard displays pending requests for the pharmacy that you are assigned to manage. Specifically, this includes pending requests for Pharmacy Access, Inactive Users to be Removed within 14 Days, and Inactive Users with No Activity for 30 Days.
Pharmacy Request Approval Steps
1. Log into the Outcomes Platform.
2. Verify that the Pharmacy Admin Dashboard is visible from the Home Page.
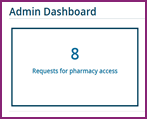
3. Select the Requests for Pharmacy Access tile.
4. Locate the desired user for which you would like to approve Pharmacy Access by using one of the methods outlined below:
-
-
-
Locate User from List
-
Search for User by entering Start Date/End Date, then clicking on Go button
-
Search for User by entering Username, First/Last Name, or Date of Birth in Search box
-
-
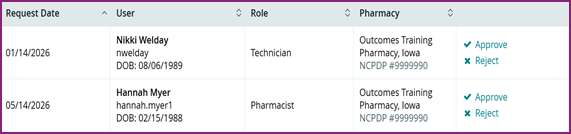
5. Click on the Approve (Checkmark icon) button in the righthand column of the user table.
NOTE: Clicking on the Reject (X icon) button will reject the request for Pharmacy Access.
6. Verify that Pharmacy Access is now granted by having the user refresh the Outcomes Platform and checking to see if they can now view the data and opportunities that are specific to your pharmacy.
Assigning User Permissions Steps
1. Log into the Outcomes Platform.
2. Verify that the Pharmacy Admin Dashboard is visible from the Home Page.
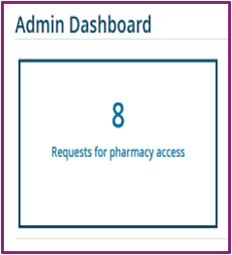
3. Select the Requests for Pharmacy Access tile.
4. Click on the All Users tab.

5. Locate the desired user for which you would like to assign Pharmacy Permissions by using one of the methods outlined below:
-
-
-
Locate User from List
-
Search for User by entering First Name / Last Name, then clicking on the Search button
-
Filter for User by selecting either the All, Users Who Will Lose Access within 14 Days, or Users with No Activity in the Last 30 Days options from the dropdown
-
-
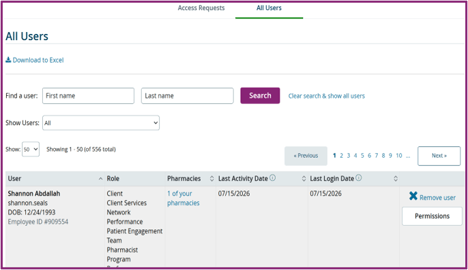
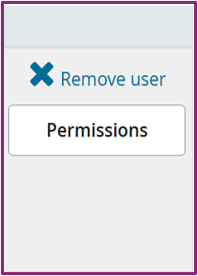
6. Click on the Permissions button in the righthand column of the user table.
7. Review the options listed in the Permissions window.
8. Assign the desired permissions to the user by following the guidelines listed below:
-
-
-
Checkmark = Permission Assigned to User
-
No Checkmark = Permission NOT Assigned to User
-
-
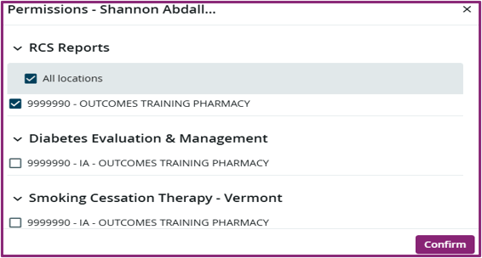
9. Click on the Confirm button to save your changes.
10. Verify that Pharmacy Permissions are now granted by having the user refresh the Outcomes Platform and checking to see if they can now view the added permissions for their role.
I. Activity Reports
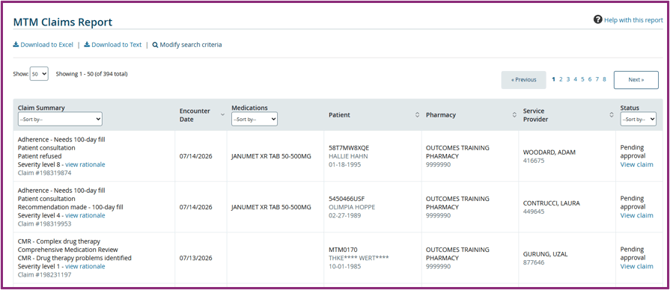
Pharmacy Administrators can run Activity Reports in the Outcomes Platform that focus on reviewing all MTM related activities that are generated via the MTM Center of the Pharmacy. Activity Reports can display metrics at either the organizational or individual store level.
Activity Report Types:
-
-
-
MTM Claims Report: Review in-progress or completed claims for MTM Centers
-
-
II. Opportunity Reports
Pharmacy Administrators can run Opportunity Reports in the Outcomes Platform that focus on reviewing all TIPs and CMRs that are generated via the MTM Center of the Pharmacy. Opportunity Reports can display metrics at either the organizational or individual store level.
Opportunity Report Types:
-
-
-
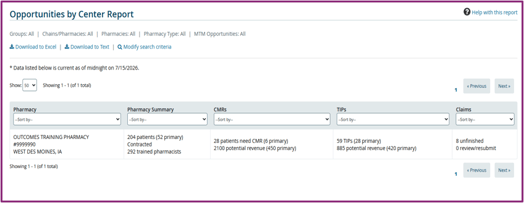
Opportunities by Center Report: Assess available MTM Opportunities, including both TIPs and CMRs, for each MTM Centers
-
Current TIPs Report: Identify pending TIP opportunities by type, reason, severity level, patient, and more
-
Current CMRs Report: Obtain a list of all patients current eligible for a CMR at a specific MTM Center
-
-
III. Performance Reports
Pharmacy Administrators can run Performance Reports in the Outcomes Platform that focus on reviewing all performance statistics related to completing TIPs and CMRs via the MTM Center of the Pharmacy. Performance Reports can display metrics at either the organizational or individual store level.
Performance Report Types:
-
-
-
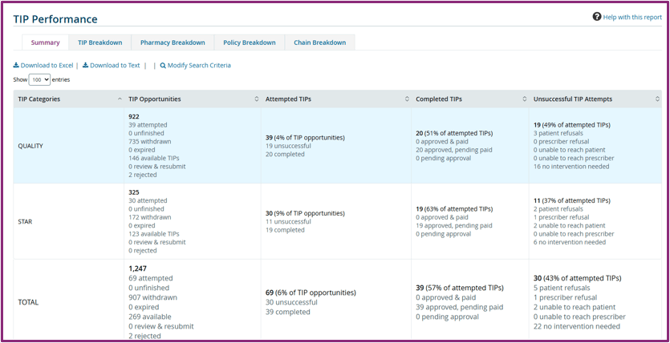
TIP Performance Report: Run MTM Center metrics regarding TIP opportunities, TIP completion, TIP success, TIP type, and more
-
CMR Performance Report: Run MTM Center metrics regarding CMR opportunities, CMR completion, and CMR success rates
-
-